


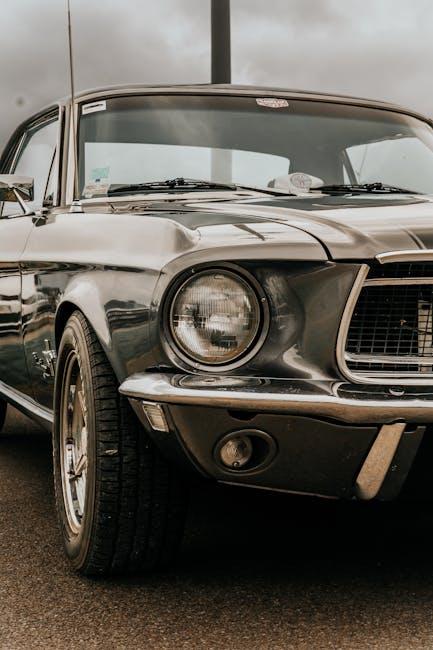
A automotive’s headlights are extra than simply beams of sunshine piercing by the night time—they’re the eyes that information your journey safely from nightfall until daybreak. Over time, these important lenses can turn out to be clouded, dimming their glow and compromising visibility. However earlier than reaching for expensive replacements or skilled providers, think about this: restoring these headlights to their former readability is likely to be simpler than you suppose. On this article, we’ll discover easy, do-it-yourself methods to brighten your experience and convey again the shine to your headlights, enhancing each your car’s look and your peace of thoughts on the street.
Desk of Contents
- Understanding the Causes of Headlight Dullness and Yellowing
- Important Instruments and Supplies for a Profitable Headlight Restoration
- Step by Step Information to Cleansing and Sprucing Your Headlights at House
- Lengthy Time period Tricks to Keep Readability and Forestall Future Headlight Injury
- Concluding Remarks
Understanding the Causes of Headlight Dullness and Yellowing
The readability of your headlights isn’t nearly aesthetics; it’s a vital think about making certain protected nighttime driving. Over time, publicity to harsh UV rays, air pollution, and street particles causes the headlight lens to deteriorate, resulting in a foggy, yellowed look. Moreover, the plastic materials of recent headlights naturally oxidizes, making a hazy barrier that dims the sunshine output. Moisture can even sneak in by small cracks or broken seals, accelerating the dulling course of and typically leading to water condensation contained in the lens.
Understanding what results in this frequent difficulty will help you stop it or deal with it successfully with DIY strategies. Right here’s a fast breakdown of the first culprits:
- UV Radiation: The solar’s rays degrade plastic over time, inflicting yellowing and brittleness.
- Environmental Pollution: Dust, street salt, and smog adhere to the floor, selling floor put on.
- Oxidation: The chemical response between plastic and oxygen creates a cloudy movie.
- Bodily Injury: Scratches and chips from particles weaken the lens’s easy end.
Important Instruments and Supplies for a Profitable Headlight Restoration
To attain that crystal-clear shine in your headlights, having the suitable instruments and supplies at hand is essential. A mixture of abrasive pads, polishes, and sealants work synergistically to take away the uninteresting, oxidized layer and shield the floor afterwards. Important objects embrace moist/dry sandpaper in varied grits for gradual smoothing, microfiber cloths for mild wiping, and a dependable plastic polish designed particularly for automotive lenses. Don’t overlook equipment like painter’s tape to protect your paintwork and a twig bottle stuffed with water for moist sanding precision.
For individuals who favor a extra organized method, right here’s a helpful guidelines to organize earlier than beginning:
- Totally different grit sandpapers (800, 1000, 2000, 3000)
- Plastic or headlight-specific polish compound
- UV-resistant clear coat or sealant
- Clear microfiber or lint-free cloths
- Masking tape to guard car paint
- Sponge applicators or sprucing pads
- Protecting gloves and security glasses
| Materials | Function | Tip |
|---|---|---|
| Moist/Dry Sandpaper | Take away oxidation layers | Begin with coarse grit, end with superb grit |
| Plastic Polish | Restore readability and smoothness | Apply in small round motions |
| UV Sealant | Shield from future yellowing | Reapply yearly |

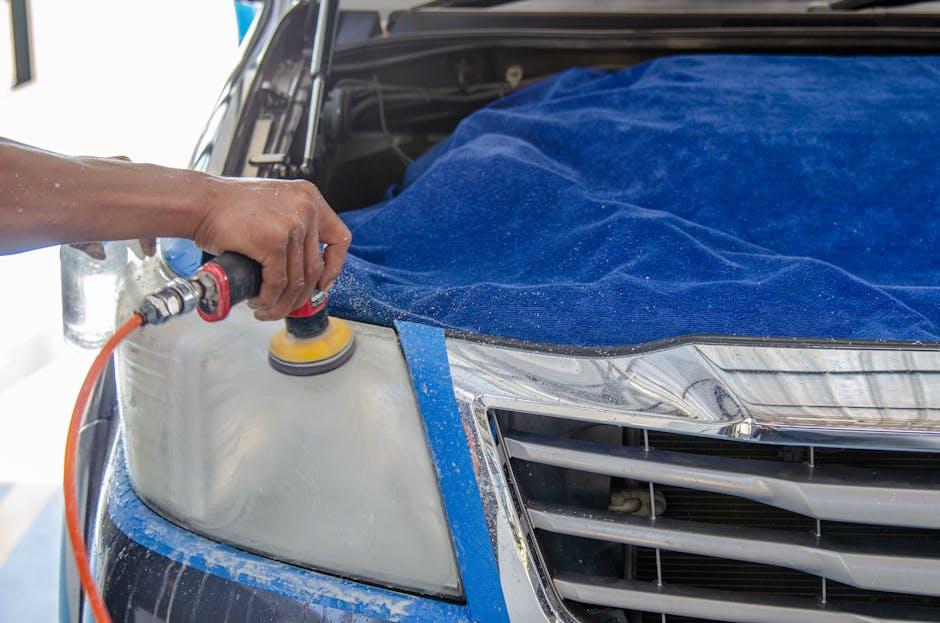
Step by Step Information to Cleansing and Sprucing Your Headlights at House
Start by completely washing the headlights with cleaning soap and water to get rid of floor grime and dirt. Gently dry the realm with a microfiber material to keep away from scratching the lens. Subsequent, shield the paint surrounding the headlights utilizing painter’s tape—this straightforward step ensures you gained’t by chance harm your car’s end throughout the restoration course of. Now you can select your most popular methodology—whether or not utilizing a headlight restoration equipment or home items like toothpaste or baking soda. Apply the chosen cleaner with a smooth material or sponge, rubbing in small round motions to interrupt down the buildup of oxidation and yellowing.
After scrubbing, rinse the headlights with clear water and dry them utterly. To boost the readability and shield the floor, apply a plastic polish or a UV-sealant coating—these merchandise not solely restore brightness but additionally guard towards future fading. For an additional contact of sturdiness, think about buffing the headlights with a smooth material in a round movement till a shiny end seems. Under is a fast reference desk recommending frequent home items and their effectiveness rankings for this process:
| Cleansing Agent | Ease of Use | Effectiveness |
|---|---|---|
| Toothpaste | Excessive | Average |
| Baking Soda Paste | Average | Excessive |
| Industrial Package | Excessive | Excessive |
| Vinegar & Water | Average | Low |

Lengthy Time period Tricks to Keep Readability and Forestall Future Headlight Injury
Defending your headlights from future put on begins with easy, constant care. Repeatedly making use of a UV-resistant sealant can protect the plastic from dangerous solar rays that trigger yellowing and hazing. Moreover, washing your headlights alongside along with your automotive utilizing gentle cleaning soap and a smooth material helps take away grime and dirt that may scratch surfaces over time. Keep away from abrasive supplies that may speed up harm, and think about parking in shaded areas or garages at any time when potential to attenuate publicity to environmental components.
Incorporating a number of preventative habits can significantly prolong the lifespan of your headlights’ readability. Listed below are some straightforward routine tricks to preserve them shining vivid:
- Month-to-month inspection: Verify for cracks or chips early to stop water ingress.
- Apply wax or sealant: Use a high quality automotive wax for a protecting barrier.
- Light cleansing: Use microfiber cloths and keep away from harsh chemical substances.
- Contact-up scratches: Mild sanding paired with plastic polish restores minor blemishes.
- Correct lighting changes: Guarantee headlights are appropriately aligned to stop glare and uneven put on.
| Motion | Frequency | Profit |
|---|---|---|
| Apply UV Sealant | Each 3 months | Prevents yellowing & cracking |
| Headlight Cleansing | Weekly | Removes grime & prevents scratches |
| Examine for Injury | Month-to-month | Early detection of cracks |
| Wax Software | Each 2 months | Enhances floor safety |
Concluding Remarks
Bringing again the glint to your headlights doesn’t must be a frightening process. With slightly time, some easy instruments, and these straightforward DIY restoration ideas, you possibly can illuminate the street forward with readability and confidence. Not solely will your experience look brisker, however improved headlights additionally improve security for each journey. So why wait? Roll up your sleeves, brighten your drive, and let your headlights shine as brightly as your adventures.
