


When the solar dips beneath the horizon and the open highway stretches forward, the standard of your headlights could make all of the distinction between a cautious journey and a assured drive. LED headlights have quickly turn into a favourite amongst automobile fans and on a regular basis drivers alike, providing brighter, clearer gentle and a contemporary edge to any car. However you don’t have to go to a mechanic or splash out on expensive upgrades to get pleasure from the advantages of LED lighting. On this DIY information, we’ll stroll you thru the steps to rework your journey with LED headlights—illuminating not simply the highway, however your sense of accomplishment alongside the best way. Whether or not you’re a seasoned gearhead or a curious novice, get able to brighten your drive with a hands-on challenge that’s as rewarding as it’s sensible.
Desk of Contents
- Selecting the Excellent LED Headlights for Your Car
- Step-by-Step Set up Course of for Seamless Lighting Improve
- Optimizing Beam Alignment for Most Highway Visibility
- Upkeep Tricks to Preserve Your LED Headlights Shining Vivid
- In Abstract

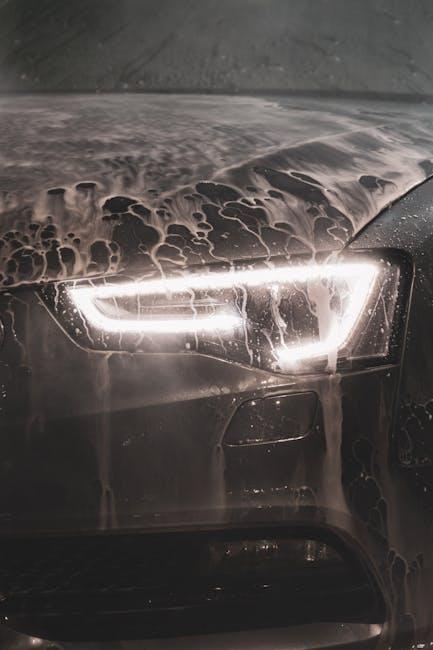
Selecting the Excellent LED Headlights for Your Car
When choosing LED headlights, it is important to contemplate elements that affect each efficiency and compatibility. Prioritize headlights with excessive lumens for brighter illumination and guarantee they’ve a coloration temperature between 5,000K to six,500K, which carefully mimics daylight and reduces eye pressure throughout nighttime driving. Moreover, verify for a dependable cooling system like built-in followers or warmth sinks to forestall overheating and prolong the lifespan of your bulbs. Do not overlook compatibility: matching the LED headlights to your car’s make, mannequin, and current wiring harness ensures a hassle-free set up and optimum performance.
For a clearer comparability, use the desk beneath to establish key options of in style LED headlight choices:
| Function | Primary LED | Premium LED | Good LED |
|---|---|---|---|
| Lumens | 3,000 | 4,500 | 5,000+ |
| Colour Temp | 5,500K | 6,000K | 5,000-6,500K |
| Cooling System | Passive | Energetic fan | Superior fan + warmth sink |
| Sturdiness | 2 years | 5 years | 7+ years |
- Test for brightness and beam sample appropriate in your driving must keep away from impairing different drivers.
- Confirm compatibility along with your car’s headlight housing and electrical system.
- Think about guarantee and assist provided by the producer for peace of thoughts.

Step-by-Step Set up Course of for Seamless Lighting Improve
Start by gathering all vital instruments and components to make sure a easy workflow. This normally contains your new LED headlights, a screwdriver set, gloves to guard your palms, and a clear fabric for dealing with bulbs. Begin by opening your automobile’s hood and finding the headlight meeting on the entrance of the car. Rigorously take away the protecting cowl or screws that maintain the meeting in place. At all times deal with the bulbs with care, avoiding direct contact with the glass to forestall untimely failure.
Subsequent, disconnect the wiring harness from the again of the previous headlight and gently take away it from the socket. Insert the brand new LED bulb into the socket, ensuring it matches snugly and aligns appropriately with the housing. Reconnect the wiring harness and safe the headlight meeting again into place. Earlier than changing all covers, check the brand new headlights by turning in your car’s lights to substantiate they illuminate correctly.
| Software | Objective |
|---|---|
| Screwdriver Set | Eradicating and securing headlight meeting |
| Gloves | Defending bulbs and palms |
| Fabric | Dealing with bulbs with out fingerprints |
| New LED Bulbs | Improve lighting supply |

Optimizing Beam Alignment for Most Highway Visibility
Reaching the right beam alignment is essential to unlocking the total potential of your new LED headlights. Misaligned beams can scale back your highway visibility and blind oncoming drivers, creating security hazards. Begin by parking your automobile on a stage floor about 25 ft from a clean wall or storage door. Use masking tape to mark the horizontal and vertical centerlines of your headlights on the wall. Then, alter the headlight screws till the brightest a part of the beam aligns slightly below and to the proper of the middle marks. This positioning illuminates the highway forward with out inflicting glare.
To fine-tune the alignment additional, take your automobile for a twilight check drive in a quiet space to guage the beam unfold and brightness. Observe any darkish spots or uneven lighting, and tweak accordingly. Have in mind these key alignment suggestions for max effectiveness:
- Guarantee your car’s suspension is at regular journey top for correct beam placement.
- Verify each headlights are adjusted evenly for balanced highway protection.
- Seek the advice of your car’s handbook for manufacturer-recommended beam angles.
| Adjustment Screw | Flip Path | Impact |
|---|---|---|
| Vertical | Clockwise | Raises beam top |
| Vertical | Counterclockwise | Lowers beam top |
| Horizontal | Clockwise | Strikes beam proper |
| Horizontal | Counterclockwise | Strikes beam left |
Upkeep Tricks to Preserve Your LED Headlights Shining Vivid
To make sure your LED headlights stay dazzling on each drive, common repairs is important. Begin by cleansing the lenses with a comfortable microfiber fabric dipped in a gentle detergent resolution—this prevents grime buildup that may boring brightness. Keep away from abrasive supplies, as they could scratch or harm the lens floor. Moreover, examine the housing seals to maintain moisture out; condensation contained in the headlight cannot solely scale back visibility but additionally trigger untimely failure of the LED bulbs.
Maintaining your wiring in verify is equally vital. Carry out routine checks for any free connections or corrosion by visually inspecting the wiring harness and connectors. Right here’s a fast guidelines to keep up optimum efficiency:
- Periodically tighten mounting screws for steady alignment
- Use dielectric grease to guard electrical contacts
- Substitute any cracked or yellowed lenses promptly
- Test for correct beam alignment each 6 months
| Upkeep Job | Frequency | Instruments Wanted |
|---|---|---|
| Lens cleansing | Month-to-month | Microfiber fabric, delicate detergent |
| Seal inspection | Each 3 months | Visible verify, alternative sealant |
| Wiring verify | Each 6 months | Multimeter, dielectric grease |
| Alignment verify | Each 6 months | Alignment device or skilled service |
In Abstract
Because the solar dips beneath the horizon and the highway forward fades into shadows, your new LED headlights will reduce by means of the darkness with readability and confidence. Putting in them your self is greater than a easy improve—it’s a hands-on journey towards safer, brighter drives and a recent connection to the open highway. With somewhat persistence and these steps in hand, you’re not simply altering bulbs; you’re reworking your nightly commute right into a brilliantly illuminated journey. So, gear up, get glowing, and let each drive shine somewhat brighter.
